
Need to cancel a meeting or appointment on your Google Calendar? It happens to all of us. Whether it’s because your plans have changed, a meeting has been rescheduled, or you simply need to clear your schedule, knowing how to cancel events correctly is important for everyone involved. In this guide, we explain how to easily cancel events in Google Calendar on both your computer and your mobile phone, making sure that all your guests are notified in the process.
Table of contents
Quick steps
On desktop
- Open Google Calendar and sign in.
- Click on the event you want to cancel.
- Click the trash bin icon to delete.
- Choose whether to delete only this event or all recurring ones.
- Confirm and notify guests if needed.
On mobile
- Open the Google Calendar app.
- Tap the event you want to cancel.
- Tap the three dots → Delete.
- Choose to delete only this event or all recurring ones.
- Confirm and notify guests (on iOS, it may send automatically).
How to cancel a Google Calendar event on desktop
1. Open Google Calendar
Go to Google Calendar on your computer and sign in with the Google account you have the event in.
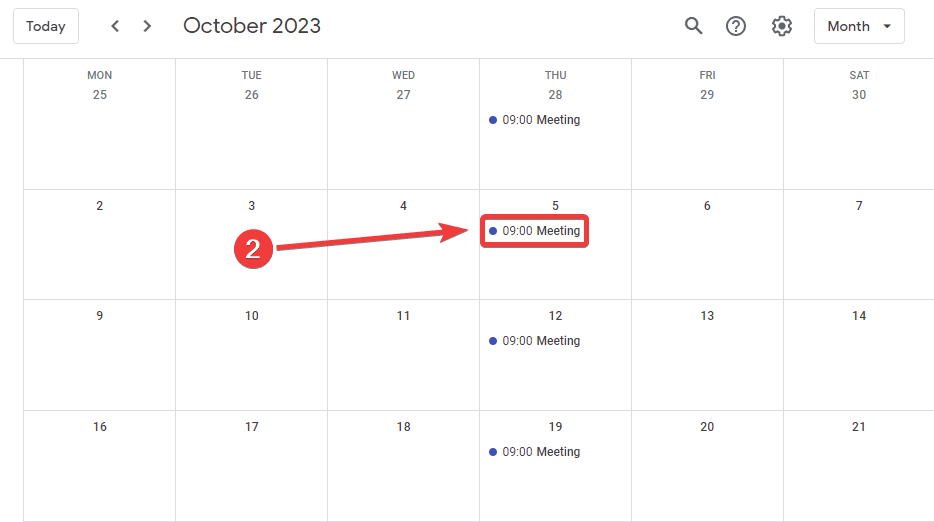
2. Locate the event
Browse through your calendar to find the event you wish to cancel. Click on the event to open its details.
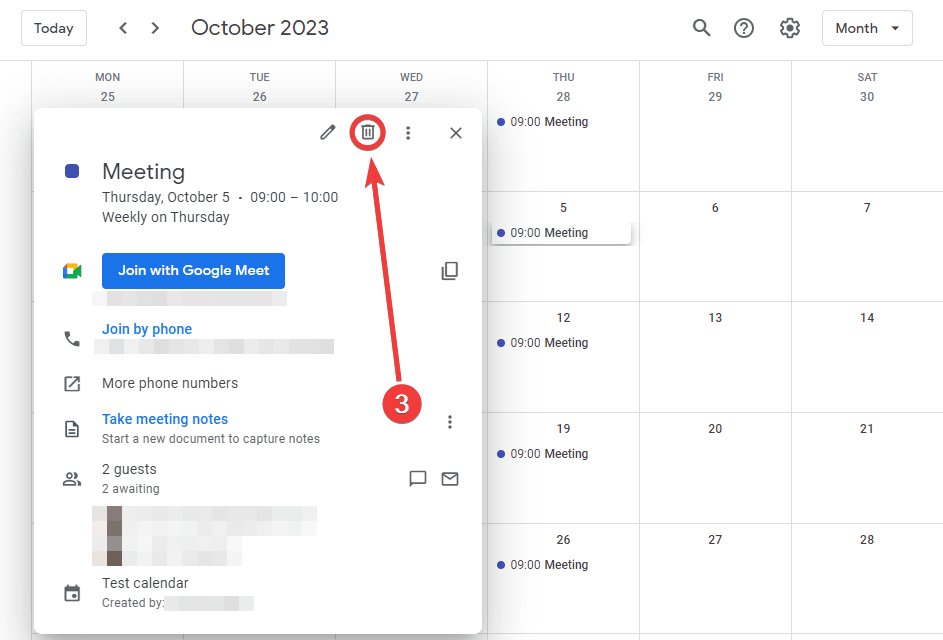
3. Delete the event
Once the event details pop up, you’ll see a trash bin icon on the top menu. Click on this icon to delete the event.
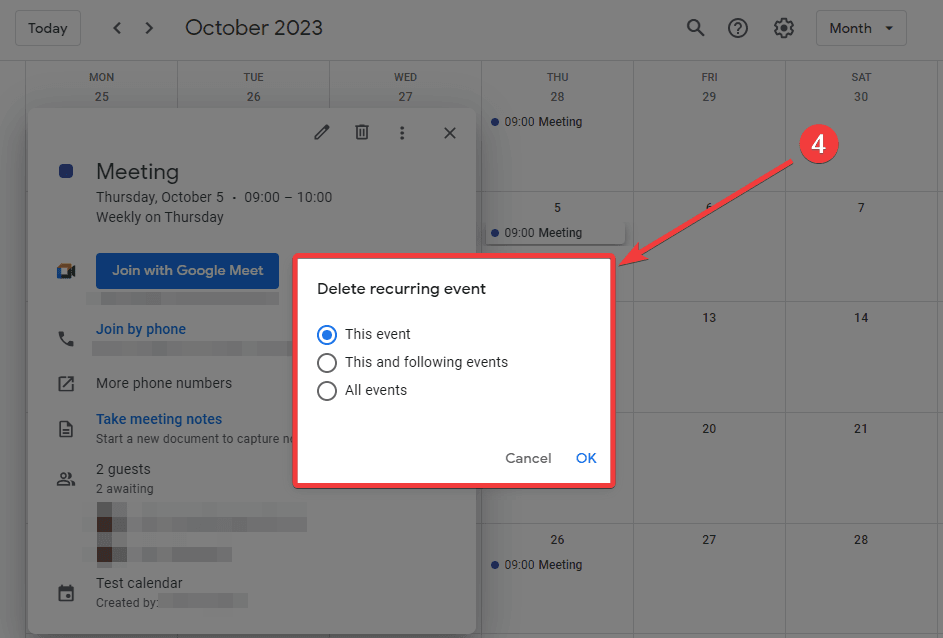
4. Optional: delete the recurring event
If the event you want to delete is a recurring event, you’ll be able to delete only the current event, the current one and the following events, and all the repeated events from this set (including those in the past).
Click OK when you have selected your preferred option, and you’re good to go!
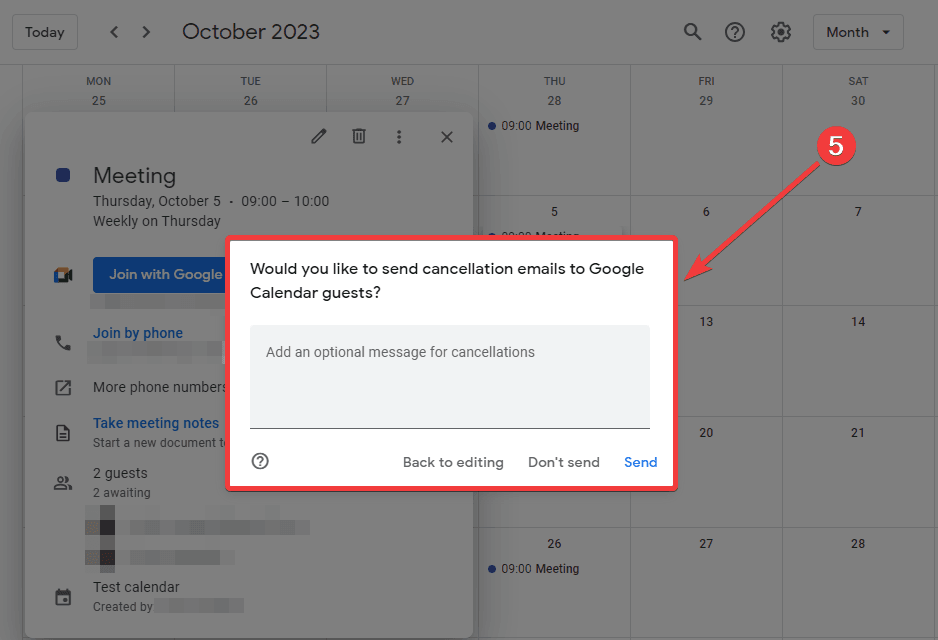
5. Confirm deletion and notify guests
A prompt will appear asking if you’d like to notify guests via email. From here, you can add an optional message to explain the reasons for the deletion. Choose your preferred option.
How to cancel a Google Calendar event on mobile
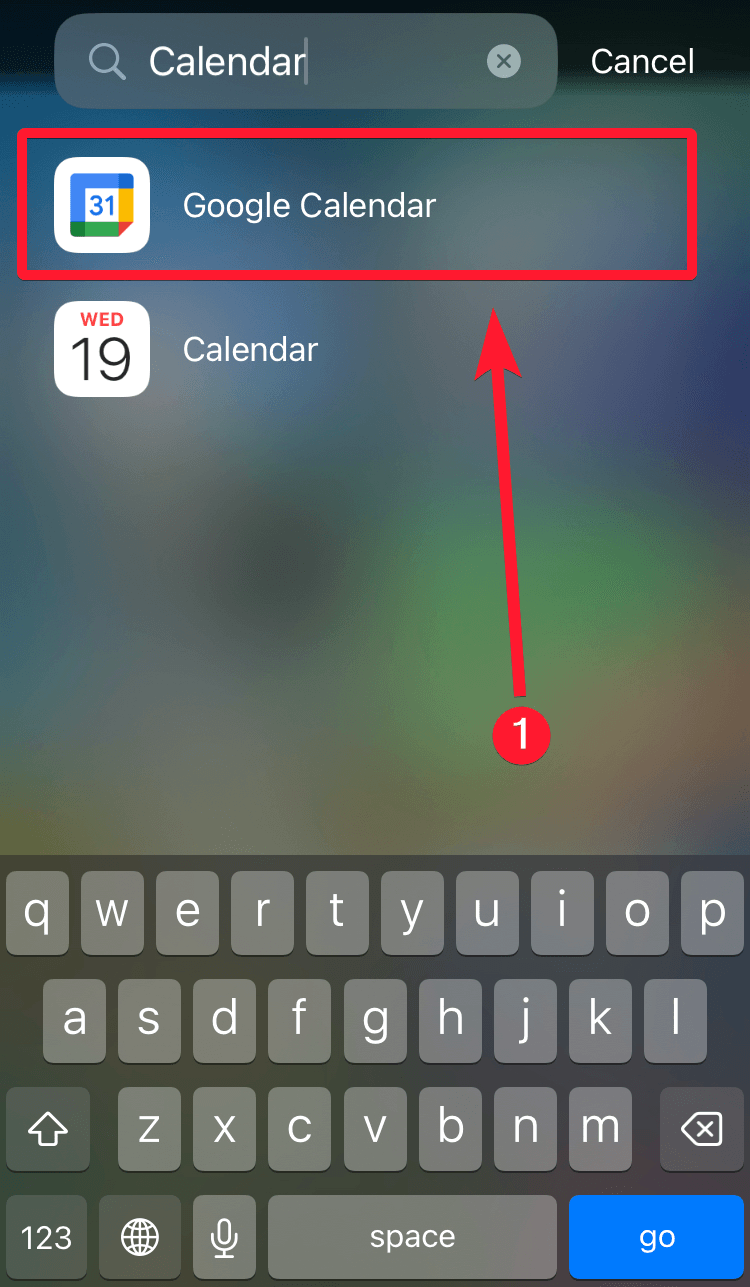
1. Open the app
Tap on the Google Calendar app on your mobile device.
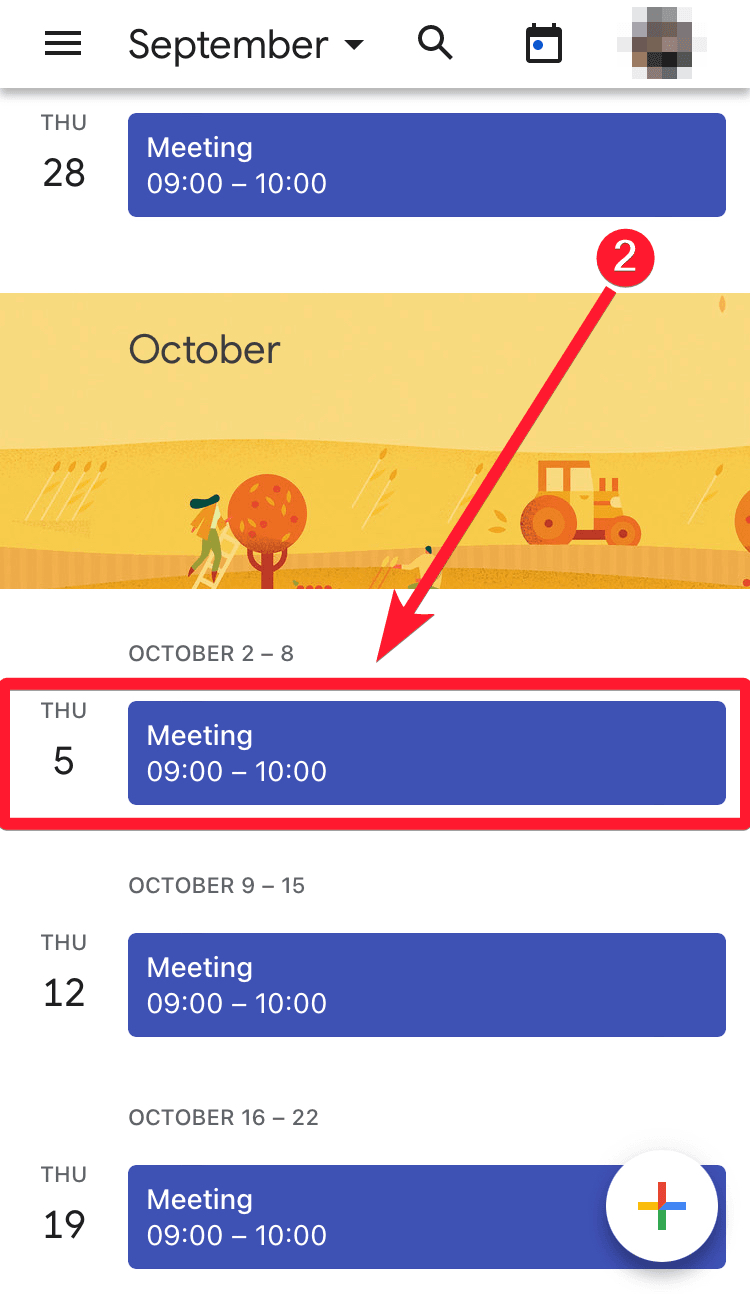
2. Find the event
Scroll through your calendar and tap on the event you want to cancel.
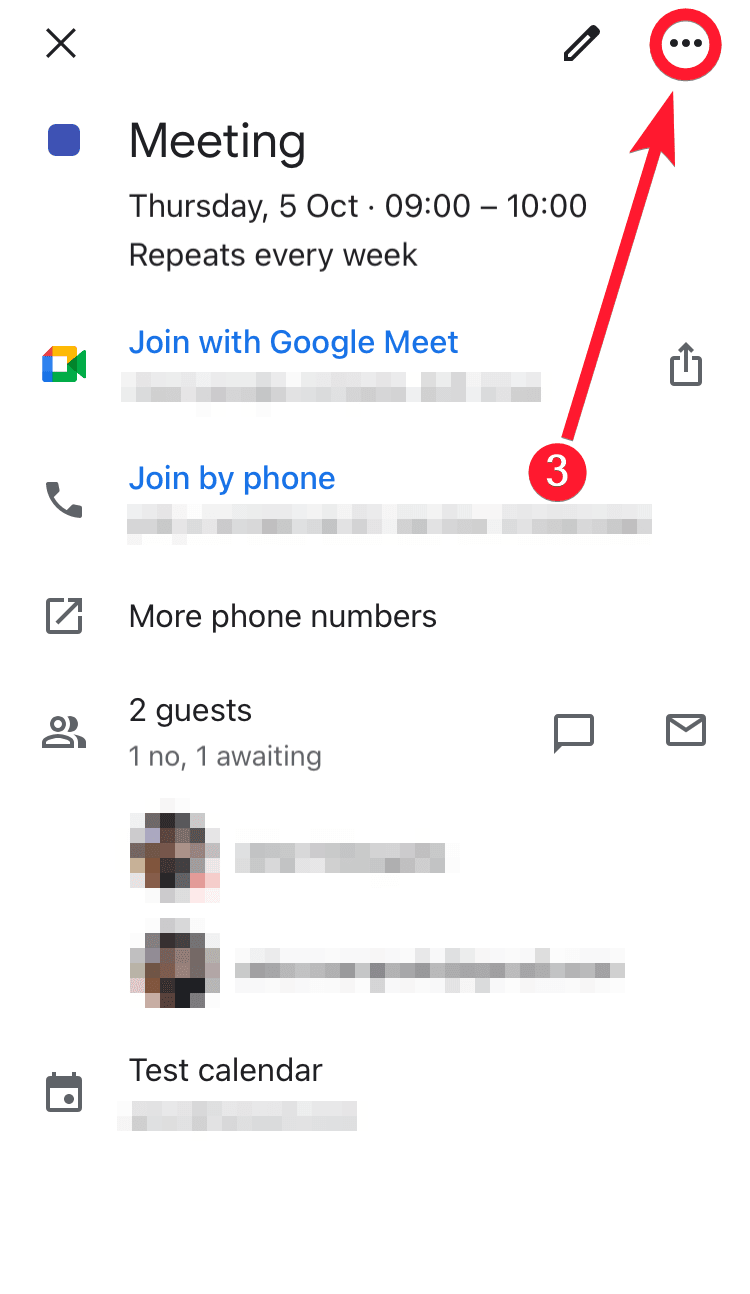
3. Locate the three dots icon
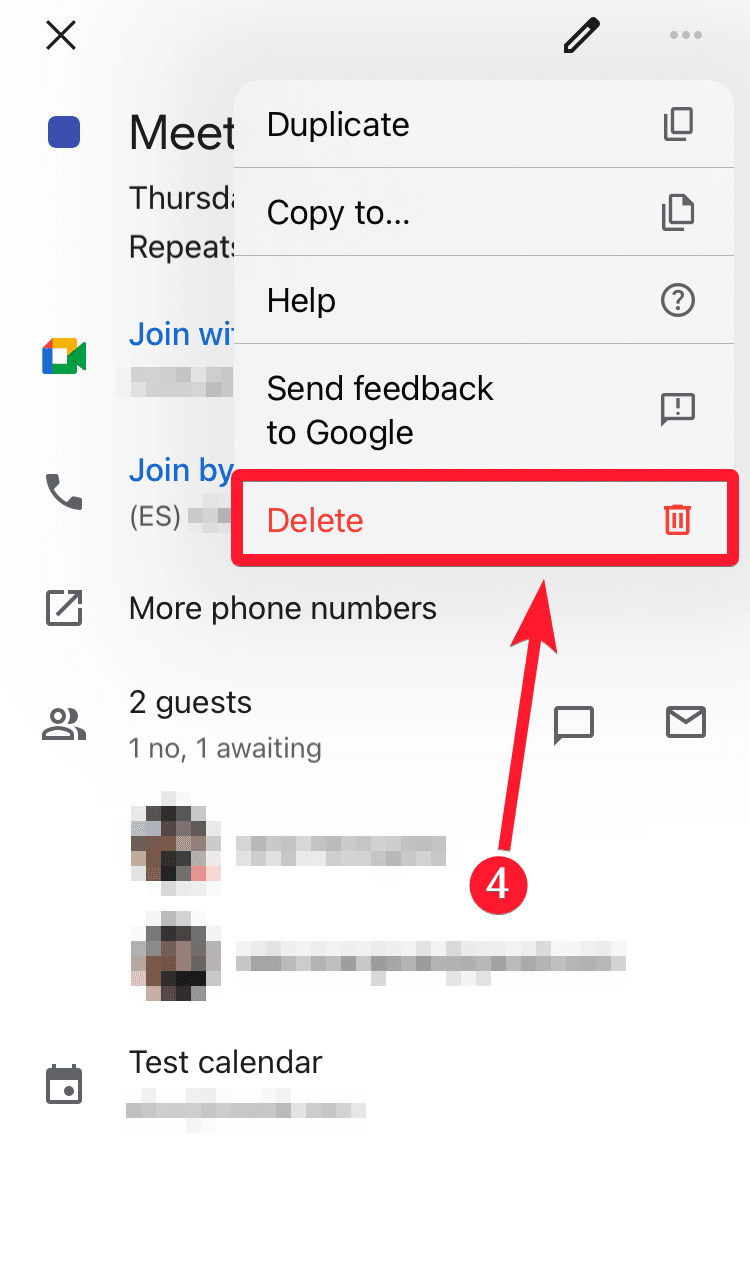
Once you tap on the event, its details will appear. Look for the three dot icon and tap on it.
4. Tap on Delete
Next, you’ll find a Delete option with a trash bin icon. Tap on it.
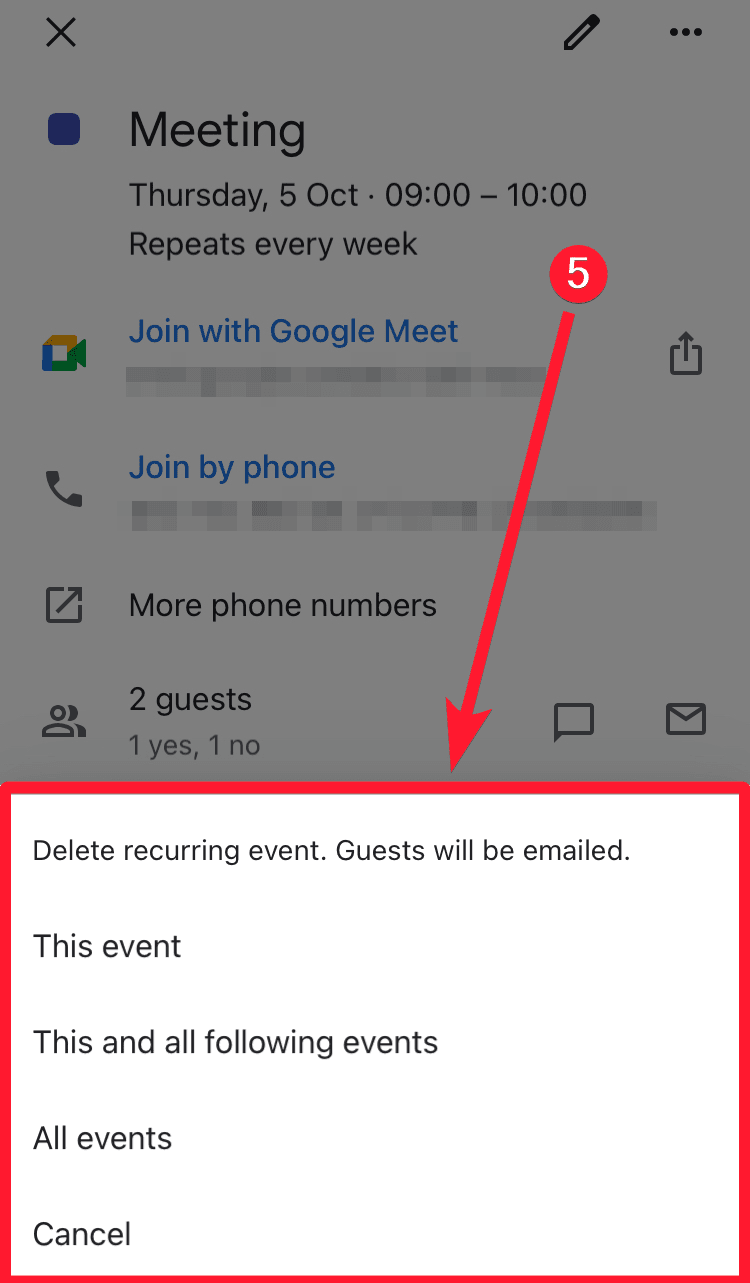
5. Optional: Delete recurring event
If the event you want to delete is a recurring event, you’ll be able to delete only the current event, the current one and the following events, and all the repeated events from this set (including those in the past). Choose your preferred option.
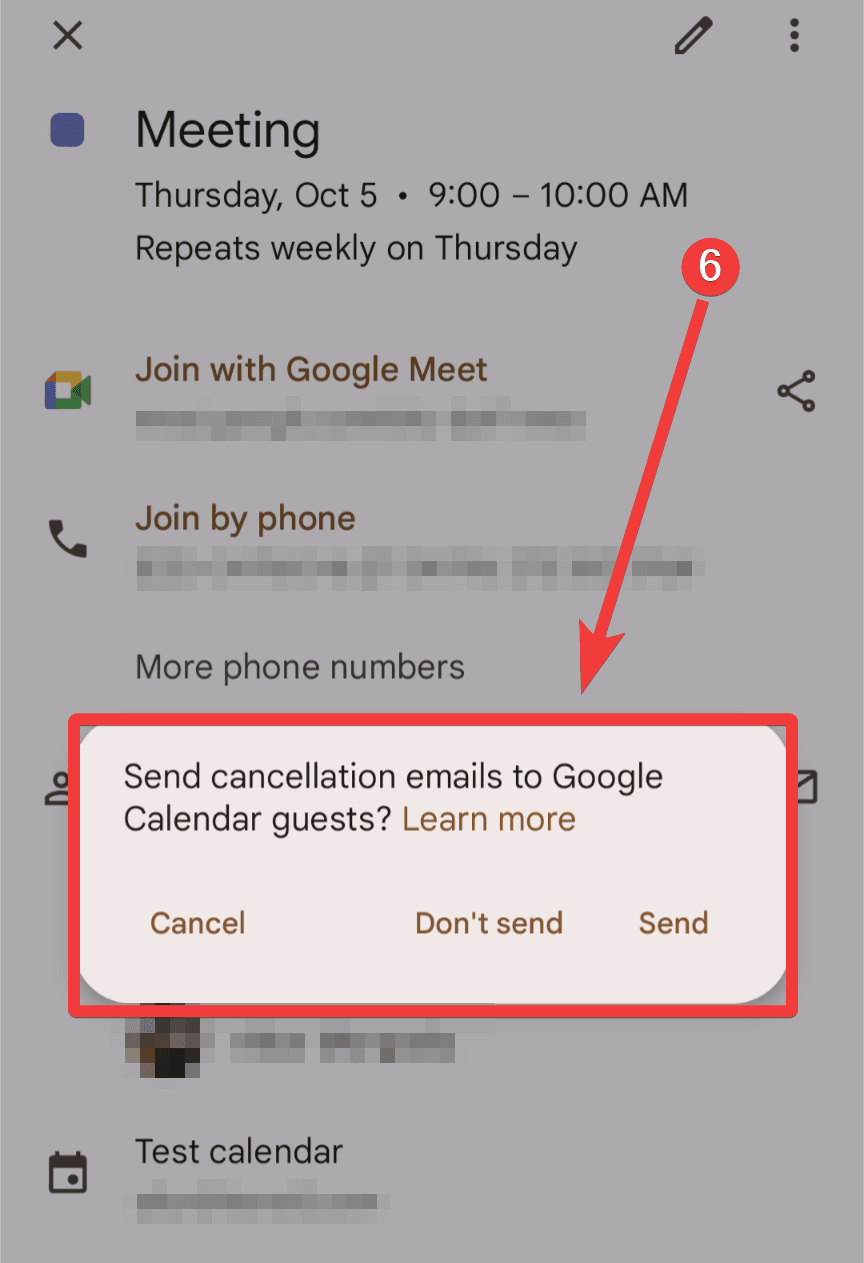
6. Notify guests
A pop-up will ask you if you want to notify guests about the event deletion. Choose your preferred option.
On iOS, the notification may be sent automatically.
👉 Related: How to Share a Google Calendar (Quick & Easy)
Automate your calendar
While Google Calendar is a widely used tool for scheduling events, Notion offers a comprehensive workspace for organizing tasks, notes, and projects. Integrating these two platforms can significantly enhance your productivity by centralizing your commitments.
This is where 2sync comes into play. We provide seamless two-way synchronization between Notion and Google Calendar, ensuring that any changes made in one platform are automatically reflected in the other. For instance, if you cancel an event in Notion, it will be canceled in Google Calendar, and vice versa. This eliminates the need for manual updates and reduces the risk of scheduling conflicts.
Key features of 2sync:
- Field Mapping: Connect specific properties in Notion with corresponding attributes in external tools, allowing for customized synchronization.
- Default values: Set static values when new entries are added from external services to Notion, streamlining data consistency.
- Selected filtering: Sync only the information that meets certain conditions, ensuring that your workspace remains organized and relevant.
